AMI Community Install (Subscribe)
How to get up and running using the Amazon AMI Community Edition.
Ingext Community Setup Guide
Follow these steps to set up the Ingext Community Edition on AWS using CloudFormation:
1. Subscribe to Ingext Community in AWS Marketplace
- Visit the AWS Marketplace and subscribe to the Ingext Community.
2. Launch the Ingext Community Using CloudFormation
-
Run the following CloudFormation template (works in us-east-1, us-east-2, us-west-1, us-west-2):
- CloudFormation Template
- _This is the only template needed for the install. _
-
Template Resources Created:
- One EC2 instance and one S3 bucket in the same region.
- Two IAM roles:
- One for the EC2 instance profile.
- One for the EC2 instance to assume.
- IAM policy for S3 bucket access.
3. CloudFormation Parameters
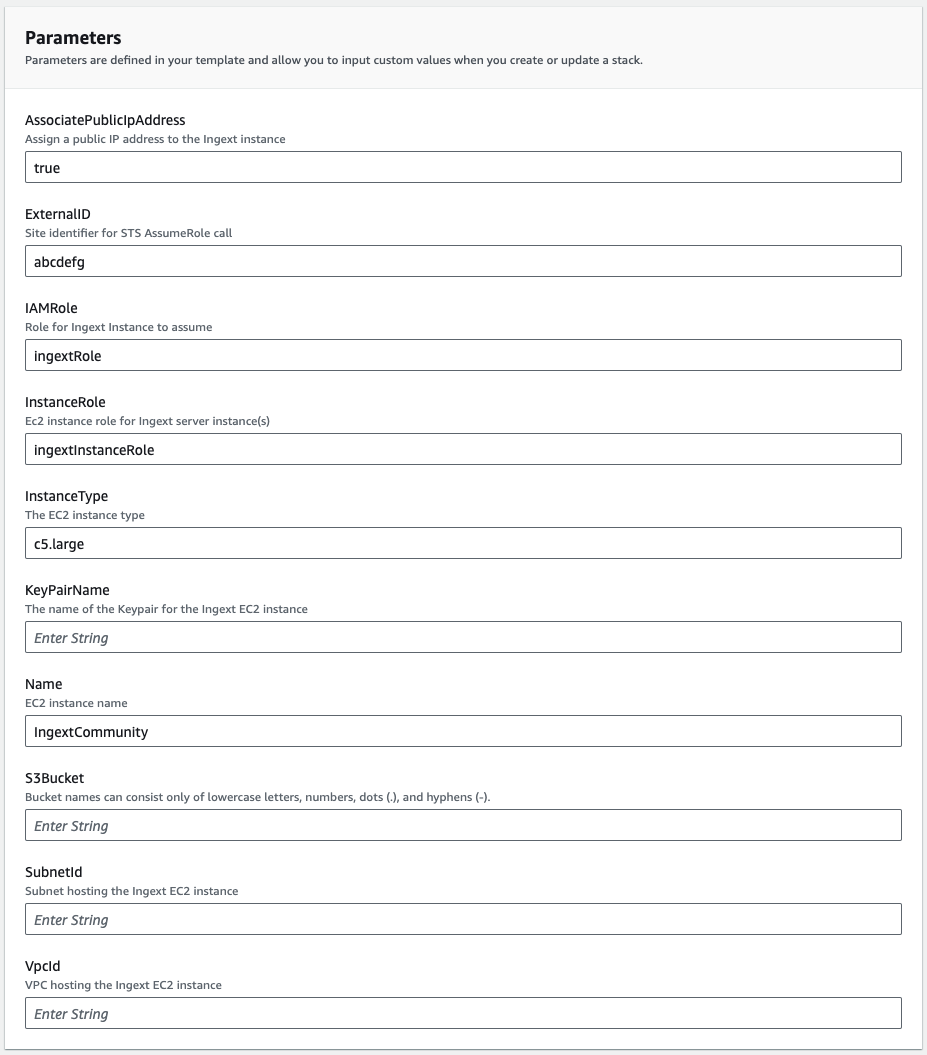
When you run the Cloud Formation yaml, you will get the following form to fill in.

The following variables are required to create the instance.
| Variable | Default Value | Note |
|---|---|---|
| External ID | Unique identifier of the instance. | |
| IAM Role | IngextRole | The IAM role name for the EC2 instance to assume. |
| Instance Role | IngextInstanceRole | IAM role name for the EC2 instance. |
| Key Pair Name | Provide a key pair name to access the EC2 instance. | |
| s3 Bucket | S3 bucket for Ingext's persistent storage. | |
| Subnet ID | Subnet ID where the EC2 instance will be launched. | |
| VPC ID | VPC ID where the EC2 instance will be launched. |
Note: the AWS prefers lowercase-only values. This is requires for the s3 bucket name.
4. Create a CloudFormation Stack
- Use the provided CloudFormation template to create the stack. Once the stack is created, note the public IP address of the EC2 instance.
5. Access Ingext Community
- Access Ingext via the public IP address of the EC2 instance.
6. Login and Complete Setup for Data Plane
- Default credentials for logging in:
- Username:
[email protected] - Password:
ingext
- Username:
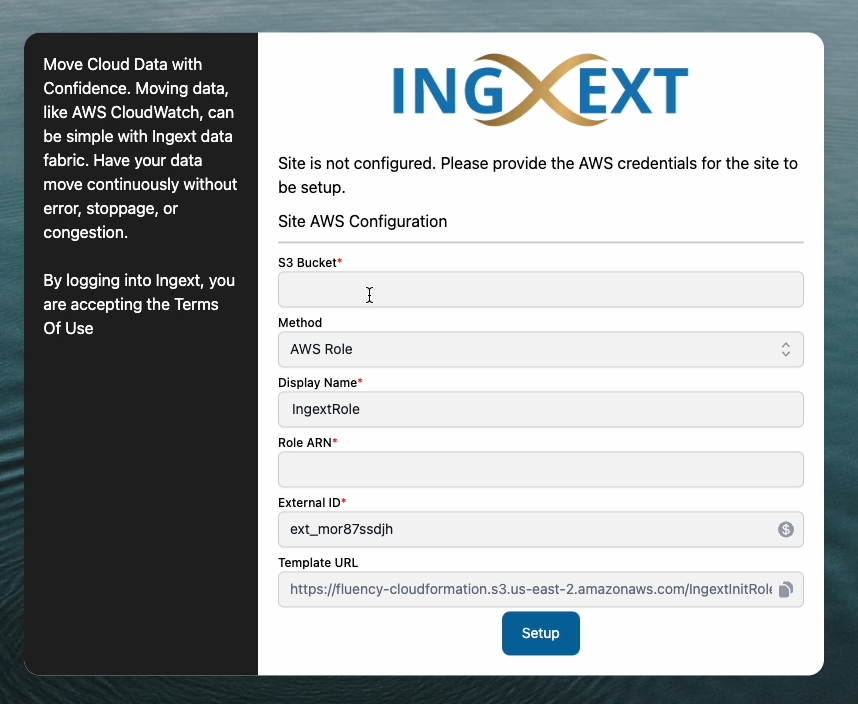
- Complete the setup wizard by providing the required information.
Data Plane Setup

The last step is to add the Role ARN and s3 Bucket data to the instance so the internal processes use this s3 storage as a data plane. **This install does not need the template to be run. ** The template here is for users that installed using the "Create Instance" option.
| Variable | Value |
|---|---|
| S3 Bucket | This is the s3 bucket name provided in the previous step, |
| Role ARN | This is the ARN of the "IAM Role". To get this, click on the IAM |
| External ID | When you created the stack, you gave it an external ID (name). Put that here. |
Getting the Role ARN
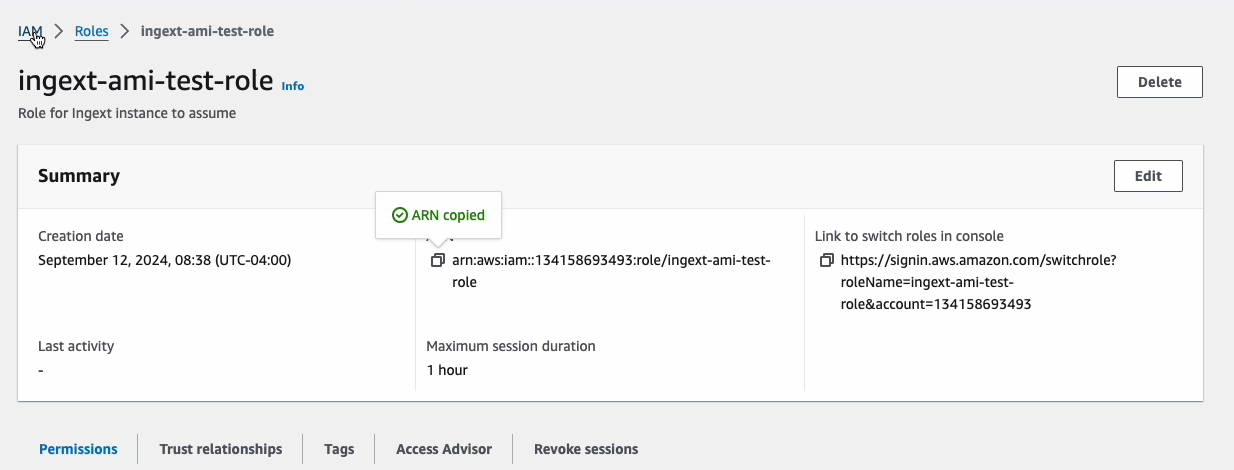
When the Cloud Formation ran, the IAMRoleR was created, clicking on this link will bring us to its output.

The output will list the ARN that can be copied.

This is the value you put into the Role ARN.
Getting the External ID
If you forgot the External ID, that can be found by clicking on the output of the Cloud Formation stack.

The first key is the ExternalID
Updated about 1 year ago
